-
RabbitMQ ClusteringElixian의 Referenece 2020. 6. 18. 20:45

토끼 RabbitMQ는 Erlang으로 만든 Message Queuing Framework 이라고 할 수 있습니다.
공식 홈에 따르면 RabbitMQ는 다음과 같은 프로토콜을 지원합니다.
Which protocols does RabbitMQ support?
RabbitMQ supports several messaging protocols, directly and through the use of plugins. This page describes the supported protocols and helps differentiate between them.
AMQP 0-9-1 and extensions
RabbitMQ was originally developed to support AMQP 0-9-1. As such this protocol is the "core" protocol supported by the broker. All of these variants are fairly similar to each other, with later versions tidying up unclear or unhelpful parts of earlier versions. We have extended AMQP 0-9-1 in various ways.
AMQP 0-9-1 is a binary protocol, and defines quite strong messaging semantics. For clients it's a reasonably easy protocol to implement, and as such there are a large number of client libraries available for many different programming languages and environments.
AMQP 0-9-1 is the protocol used by RabbitMQ tutorials.
STOMP
STOMP is a text-based messaging protocol emphasising (protocol) simplicity. It defines little in the way of messaging semantics, but is easy to implement and very easy to implement partially (it's the only protocol that can be used by hand over telnet).
RabbitMQ supports STOMP (all current versions) via a plugin.
MQTT
MQTT is a binary protocol emphasising lightweight publish / subscribe messaging, targetted towards clients in constrained devices. It has well defined messaging semantics for publish / subscribe, but not for other messaging idioms.
RabbitMQ supports MQTT 3.1 via a plugin.
AMQP 1.0
Despite the name, AMQP 1.0 is a radically different protocol from AMQP 0-9-1 / 0-9 / 0-8, sharing essentially nothing at the wire level. AMQP 1.0 imposes far fewer semantic requirements; it is therefore easier to add support for AMQP 1.0 to existing brokers. The protocol is substantially more complex than AMQP 0-9-1, and there are fewer client implementations.
RabbitMQ supports AMQP 1.0 via a plugin.
HTTP and WebSockets
While HTTP is not really a messaging protocol. However, RabbitMQ can transmit messages over HTTP in three ways:
- The Web STOMP plugin supports STOMP messaging to the browser using WebSockets.
- The Web MQTT plugin supports MQTT messaging to the browser using WebSockets.
- The management plugin supports a simple HTTP API to send and receive messages. This is primarily intended for diagnostic purposes but can be used for low volume messaging without reliable delivery.
엄청나군요.
RabbitMQ는 Erlang 기반이므로 기본적으로 멀티 호스트에서의 분산 처리를 지원합니다.
바로 이 점이 "Development Philosophy of Elixian" 이며 제가 Elixir를 선택한 이유이기도 합니다.
나중에 다시 언급하겠지만 Elixir / Erlang은 분산 처리 환경과 Fast Fail 이라는 두 가지 컨셉은 정말 다른 어느 언어보다도 훌륭하다고 생각합니다.
다시 본론으로 돌아와서...
RabbitMQ는 elixir에서 했던 것과 동일하게
Node.connect :"rabbit@host1" 처럼 간단한 함수 호출 하나로 호스트간의 연결을 유지시켜 줍니다.
(예: elixir 에서 Node Connect 할 때에 iex --name api@hole1 과 같이 접속하면 해당 노드와 connection이 이루어 집니다.)
Erlang은 이 기능에 대한 보안을 위해 RABBITMQ_ERLANG_COOKIE 를 설정하게 하는데요.
이게 docker-compose로 up 하다가 어이 없는 상황을 경험하게 됩니다.
아래와 같이 RabbitMQ 공식 이미지를 사용하였을 경우,
Host1에서는 Cookie가 설정한 값대로 잘 들어있지만 Host2와 Host3에서는 엉뚱한 값이 들어 있는 경우가 있습니다.
docker-compose exec rabbitmq01 cat ~/.erlang.cookie
"TLSD23932LKDX"
rabbitmqctl join_cluster 시에 아무리 시도를 해도 노드를 찾지 못해 애 먹었는데요.
실제로 docker-compose.yml 에서 cookie를 설정했기 때문에 아무런 의심 없이 모든 노드가 동일한 cookie를 가지고 있을거라 예상했지만 결과는 사뭇 달랐습니다.
결국엔 echo \"이것은 cookie 입니다.\" > ~/.erlang.cookie 로 업데이트 후, clustering 성공했습니다.
version: '3.8'
services:
rabbitmq01:
image: rabbitmq:3-management
container_name: rabbitmq01
hostname: hole1
environment:
- RABBITMQ_ERLANG_COOKIE="이것은 cookie 입니다."
- RABBITMQ_DEFAULT_USER="rabbit"
- RABBITMQ_DEFAULT_PASS="hole"
- RABBITMQ_NODE_NAME="rabbit@hole1"
- RABBITMQ_NODE_TYPE="queue-ram"
ulimits:
memlock:
soft: -1
hard: -1
volumes:
- ./config/rabbitmq.config:/etc/rabbitmq/rabbitmq.config
- ./config/definitions.json:/etc/rabbitmq/definitions.json
- ./data:/var/lib/rabbitmq
- logs:/var/log/rabbitmq
ports:
- 4369:4369
- 5671:5671
- 5672:5672
- 15672:15672
- 25672:25672
- 35197:35197
network_mode: host
restart: always
volumes:
logs:
driver: local
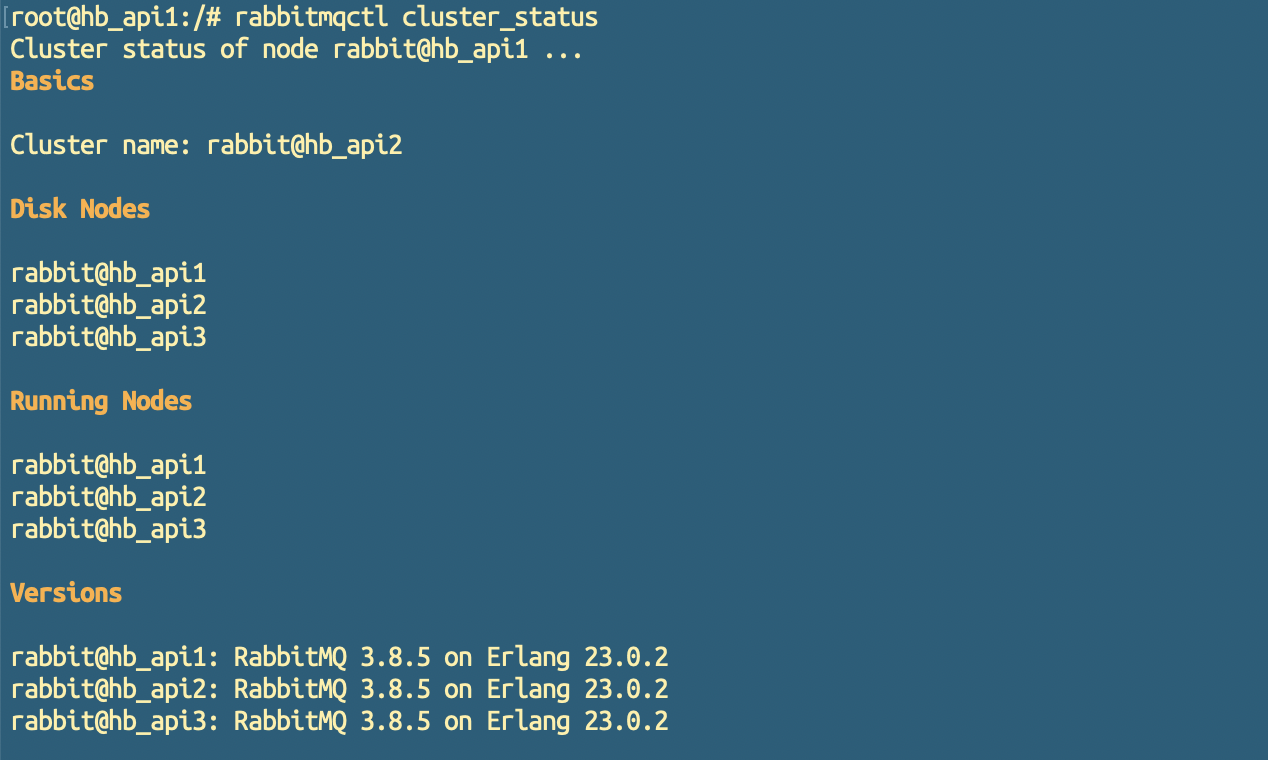
클러스터링이 성공하면 다음과 같은 로그가 나옵니다.

클러스터링 성공!!! # 추가 1
기본적으로 네트워크는 모두 host를 사용하였으며
각각의 docker host 에서 /etc/hosts 파일을 다음과 같이 수정하였습니다.
(보안을 위해 ip / domain / alias는 실제와 다르게 변경하였습니다. 위의 로그와 다를 수 있음을 참고해주세요.)
10.10.120.11 api1.elixian.co.kr hole1
10.10.120.12 api2.elixian.co.kr hole2
10.10.120.13 api3.elixian.co.kr hole3설정을 변경한 뒤, 꼭 네트워크 호스트 데몬을 재시작 해줍니다.
systemctl restart systemd-hostnamed# 추가 2
네트워크를 Host 로 사용하여 /etc/hosts 를 수정하면 container에서도 동일하게 적용됩니다.
만약 Bridge였다면 어땠을까요? ^^;;
테스트 해보지는 않았습니다만 link를 잡는다던가 network을 connect 한다던가하는 작업이 필요하지 않았을가 생각해 봅니다.
# 추가 3
인터넷을 뒤지다가 재미난 것을 발견했습니다.

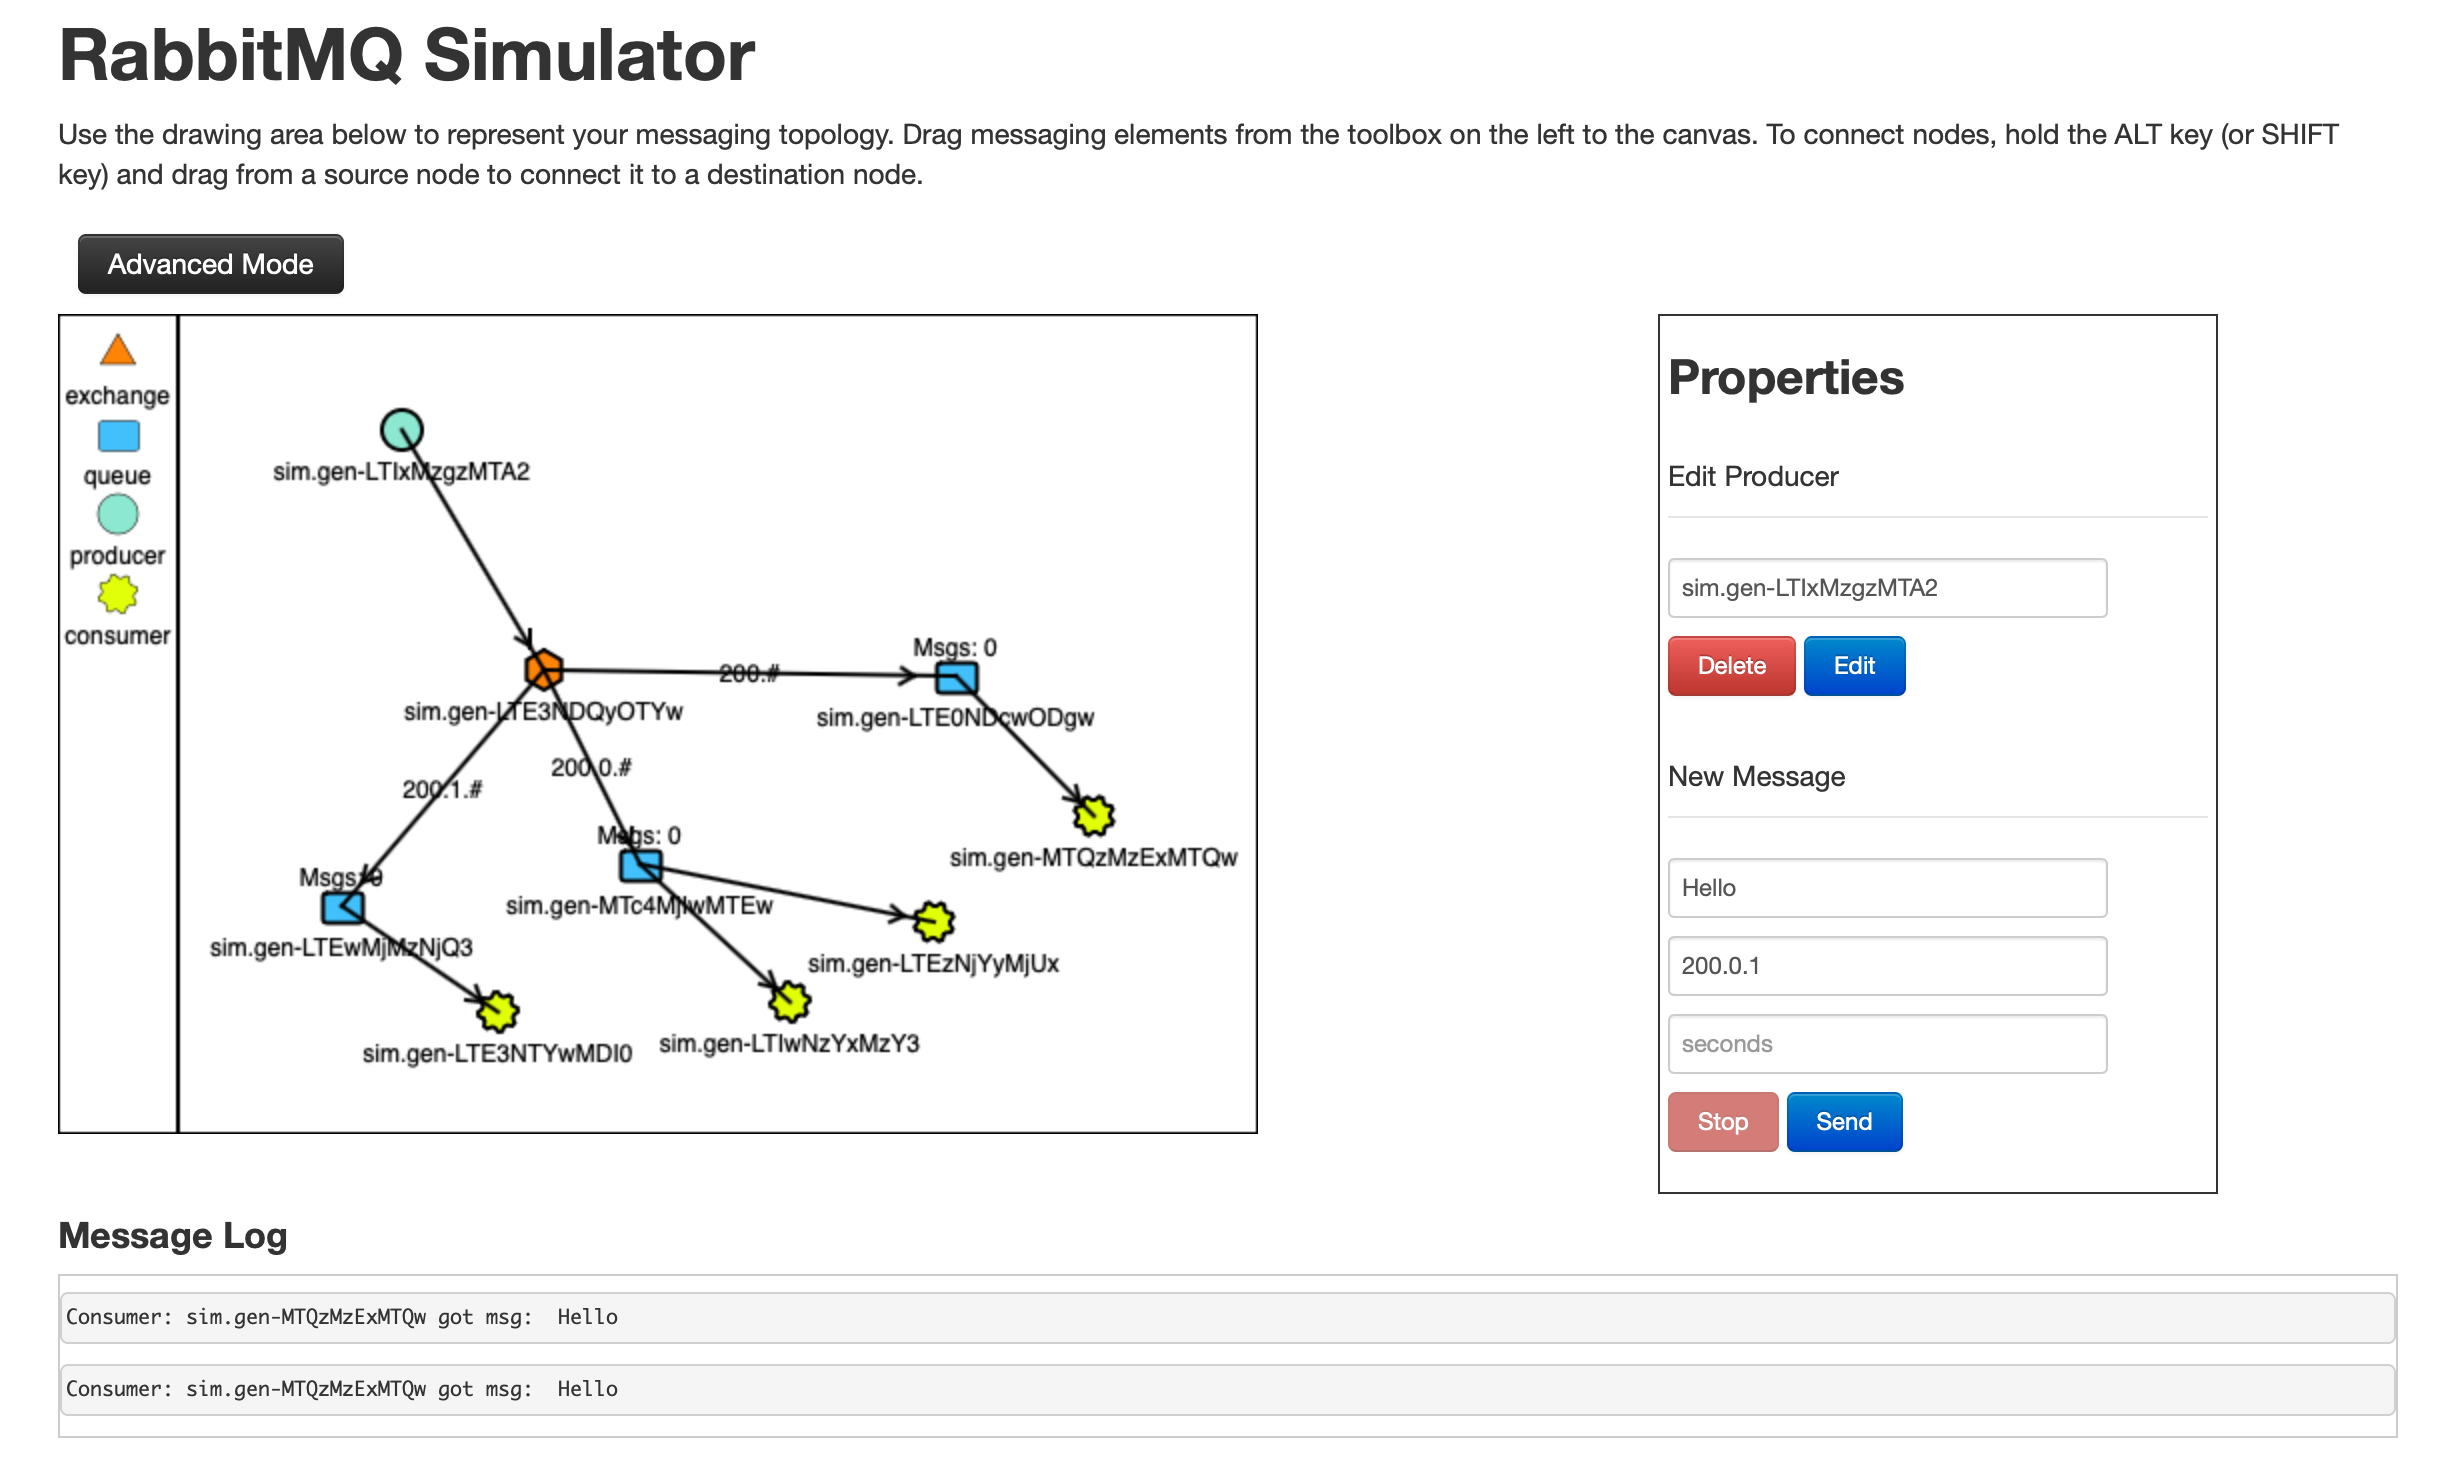
http://tryrabbitmq.com Try RabbitMQ 라는 사이트인데요.
다양한 Exchange Type과 Producer / Consumer / Queue를 배치해 보면서 어떻게 데이터가 흘러가는지 시각적으로 확인할 수 있습니다.
잘 만들었네요 ^^;;
'Elixian의 Referenece' 카테고리의 다른 글
ELK Stack의 보안 (0) 2020.06.17